Payanywhere tips
Send an invoice with PayAnywhere

Payanywhere tips
One of the latest updates to PayAnywhere brings a welcome addition to the PayAnywhere app and the Business section of PayAnywhere Inside. You can now easily create and send your customers an invoice. Here’s how to do so:
PayAnywhere Inside
- Click the orange “+” button in the upper right-hand corner of your screen.
- Enter the amount, add an optional description, and set tax options.
- Choose a customer or add a new one. (An email address is required.)
- Select a due date.
- Click “SEND” or choose to save the invoice as a draft.
PayAnywhere App
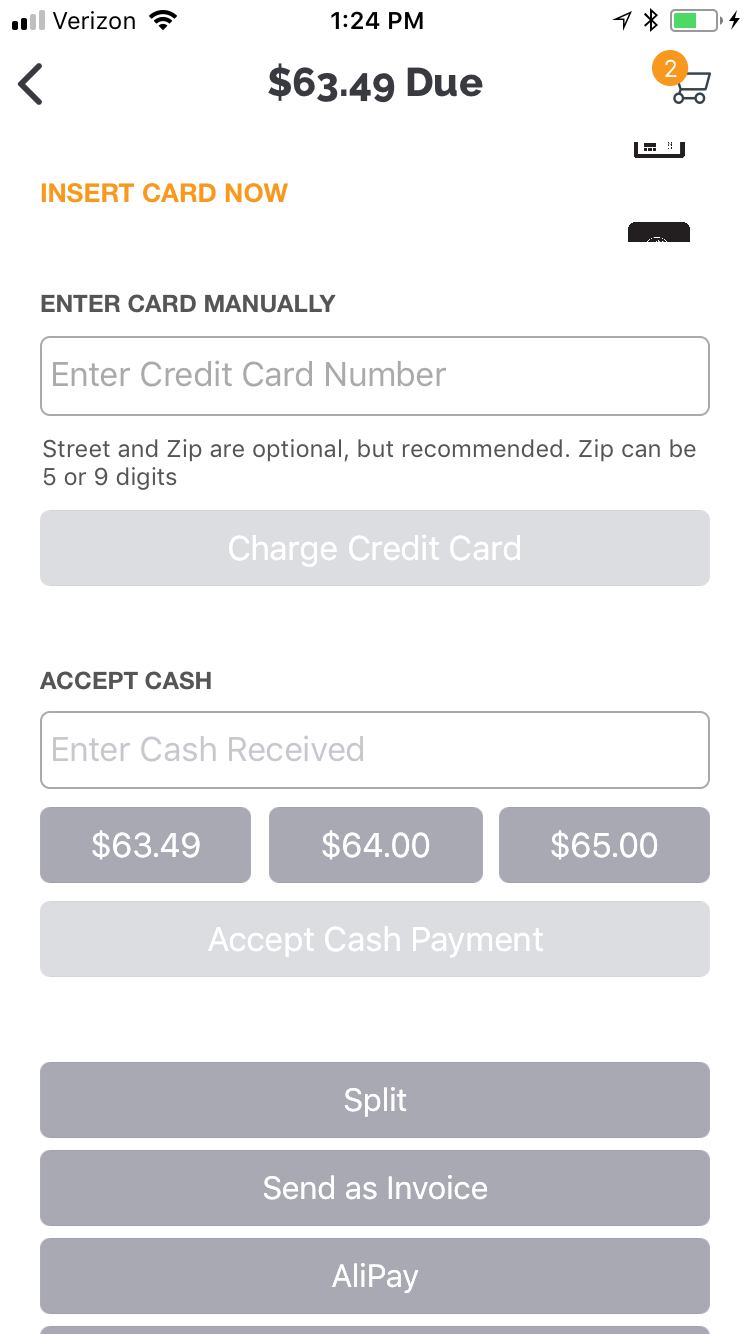
- View your cart and Proceed To Checkout.
- From the Checkout screen, select Send as Invoice.
- Enter Invoice and Customer information and choose a Due Date.
- If this is a recurring invoice, enable Create Recurring Series and choose the start date, end date, and when it should repeat.
- Tap SEND to send the invoice to your customer.
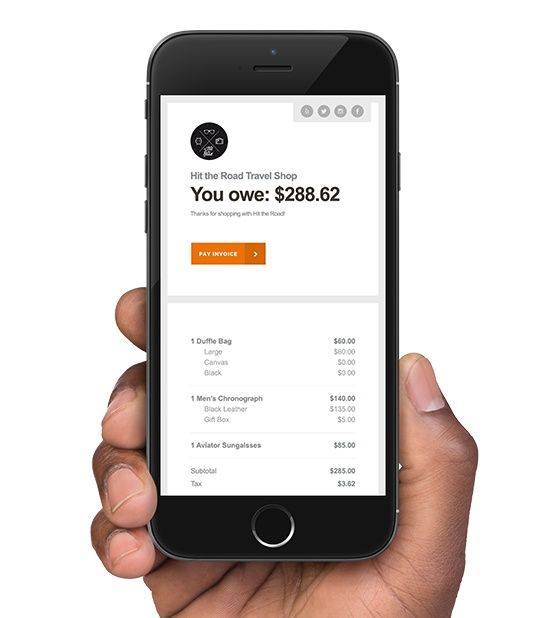
Your customer will receive their invoice via email, linking to a secure payments page where they can pay online and receive an email receipt. Be advised that the link provided in the invoice email is valid for 90 days.
You can manage and resend your invoices in PayAnywhere Inside. Paid invoices can also be accessed under Activity → Transactions. Invoices can be Marked As Paid if a customer pays via another method. Archive an invoice to delete it with the option to re-open it at a later date.
One final note: For pricing purposes, invoices are considered keyed transactions.
To learn more about Invoices or payment links, visit our FAQ.
More from Payanywhere tips
Start your Payanywhere account.
 |  |  |  |  |  | |
|---|---|---|---|---|---|---|
Payment types | ||||||
EMV chip card payments (dip) | ||||||
Contactless payments (tap) | ||||||
Magstripe payments (swipe) | ||||||
PIN debit + EBT | ||||||
Device features | ||||||
Built-in barcode scanner | ||||||
Built-in receipt printer | ||||||
Customer-facing second screen | ||||||
External pinpad | ||||||
Wireless use | ||||||
Network | ||||||
Ethernet connectivity | With dock | |||||
Wifi connectivity | ||||||
4G connectivity | ||||||
Pricing | ||||||
Free Placement | ||||||